
87 monte ss - Stable Mates
2001 Chevy Silverado
Finally in October 2001 I took the plunge and bought a new Chevy Silverado. I selected this one because it met my needs. Although a base model it came equipped with everything I was looking for. A 4.8 Litre V-8, Automatic, A/C, P/S, P/B, cloth seats, carpeting and cruise control. It also came with the "smooth ride" suspension. All my other trucks had heavy duty suspensions that would rattle your fillings loose.
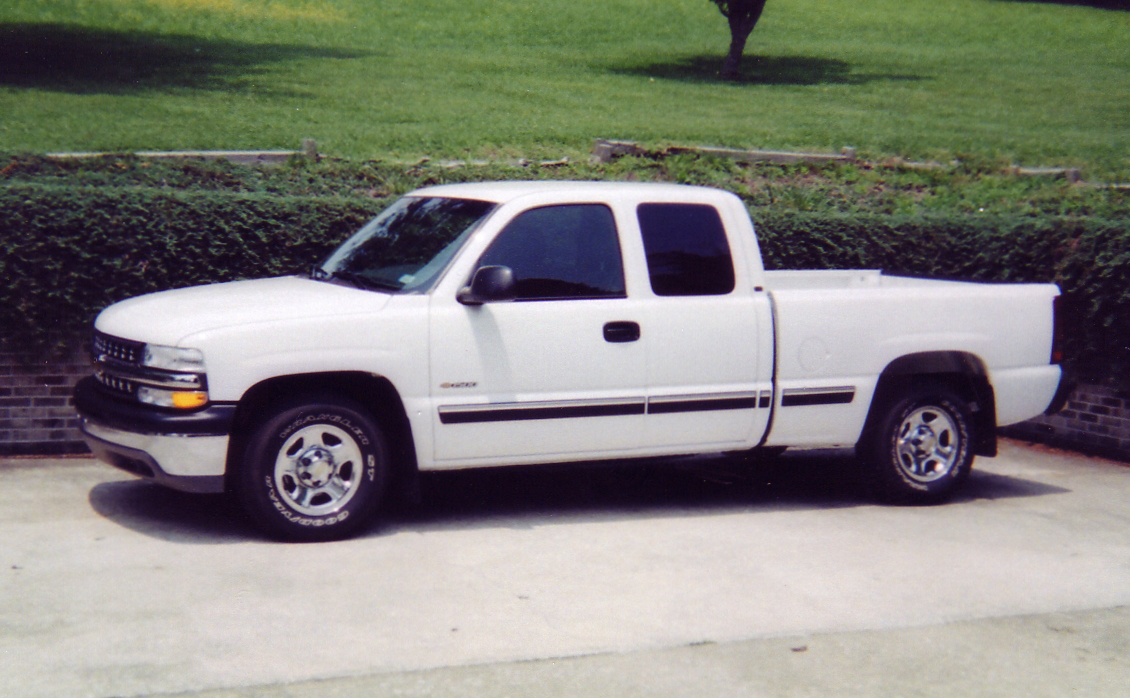
I was originally concerned I'd miss an 8ft. bed, but after comparing a standard cab 8ft. model to an extended cab with a 6.5ft. bed... let's just say there was no comparison. Extended cab FTW!
The extended cab short bed turned out to be the perfect compromise. What I ended up with was (in essence) a full size sedan with a bed. When you're 6 ft. 2, a modern "full size" car just doesn't cut the mustard. A fiberglass tonneau cover from ARE (installed a couple of months after this shot was taken), completed the package. I've logged 80k miles, and only had to have the fuel module replaced at around 70k miles. This one's a keeper.

Tailgate Latch (3/18/17)
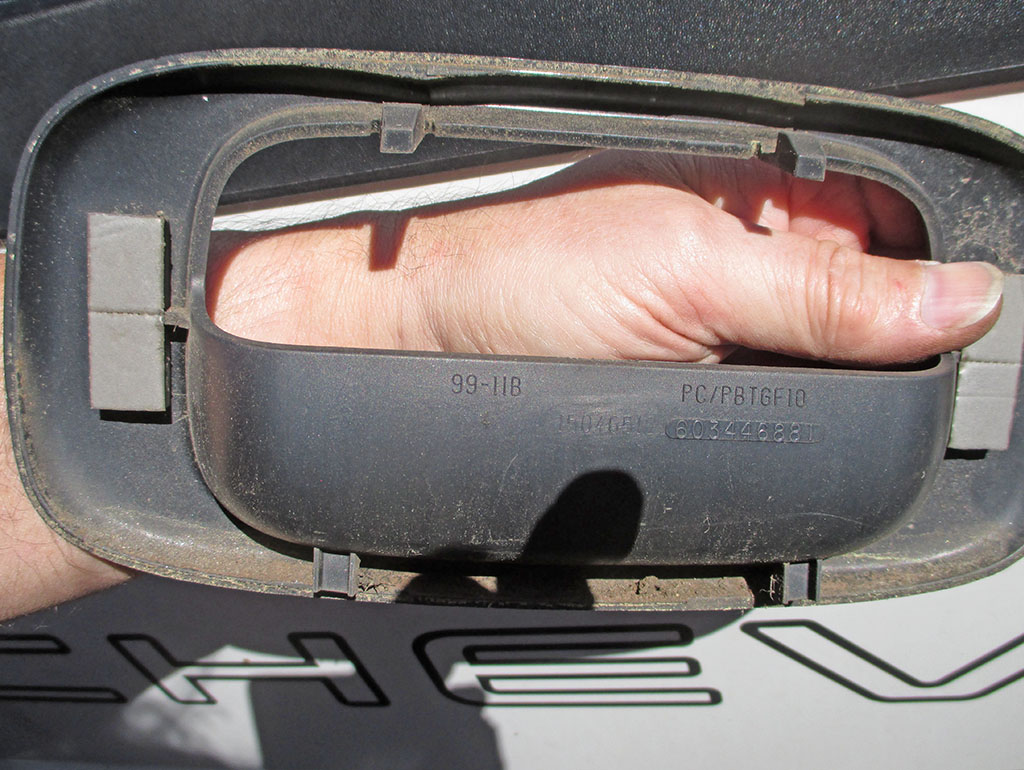
I stopped in at my local Harbor Freight to pick up a sandblasting cabinet. We loaded the box 'o stuff with no problem, I closed the tailgate and headed for home like I've done a million times before. Once there... the damned tailgate would not open. No way, no how. I pounded on the top of the tailgate, pulled, pushed, shook... nothing. Figuring it was stuck somehow, I pulled on the handle harder. A lot harder. There was a BANG! and the handle was (quite obviously), no longer connected to anything. I flipped the sandblasting cabinet box up and over the tailgate, onto a waiting handtruck and trundled the whole kit and caboodle into my shop. The tailgate remained shut, tight as a clam.
A week later a box from Rock Auto arrived and I could now initiate repairs. I watched a few YouTube videos of guys in a similar pickle and the trick is to push down on the top lip of the trim piece that surrounds the handle itself (gently), and pull it forward. I left the truck sitting in the sun for an hour or two so the plastic would be more flexible. Then I wiggled and lifted to disengage the two plastic tabs on the bottom of the trim bezel and presto! It was out and un-broken to boot!
Another situation where having x-ray vision would've come in real handy. As soon as I had the trim bezel removed the problem was stupefyingly obvious. Both rods which are supposed to be connected to short, flat tabs of steel with holes in the ends are just sitting there. Quietly mocking me. Had I known this, I could've saved the wasted effort (and ensuing damage) of trying to force the tailgate open.
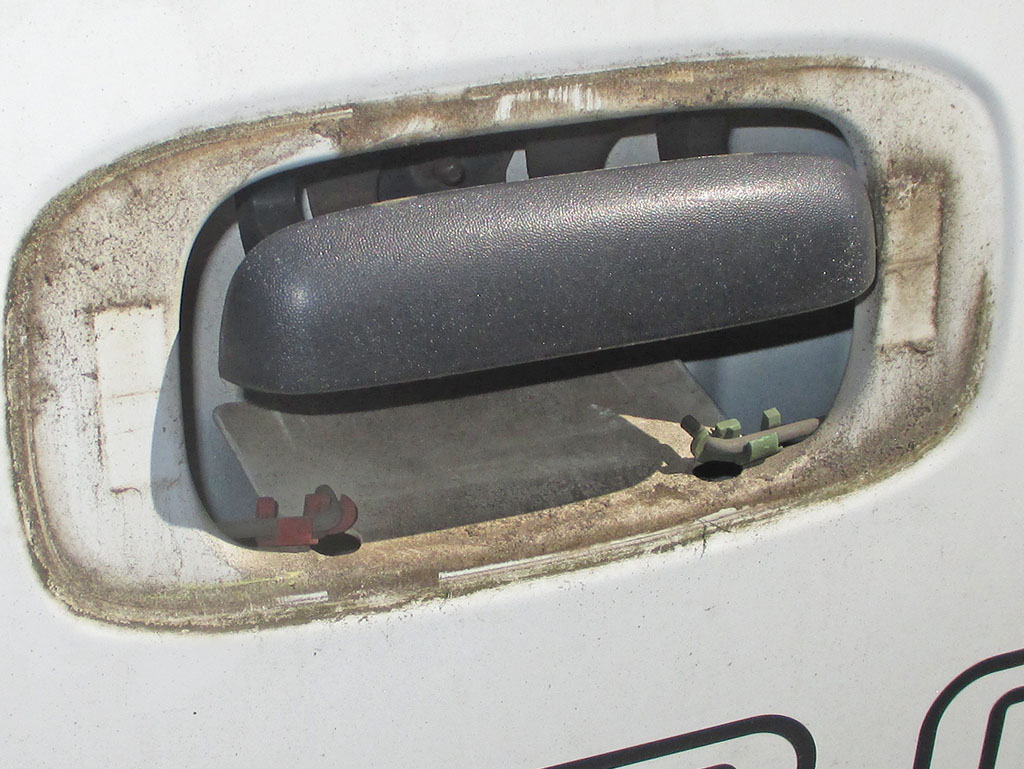
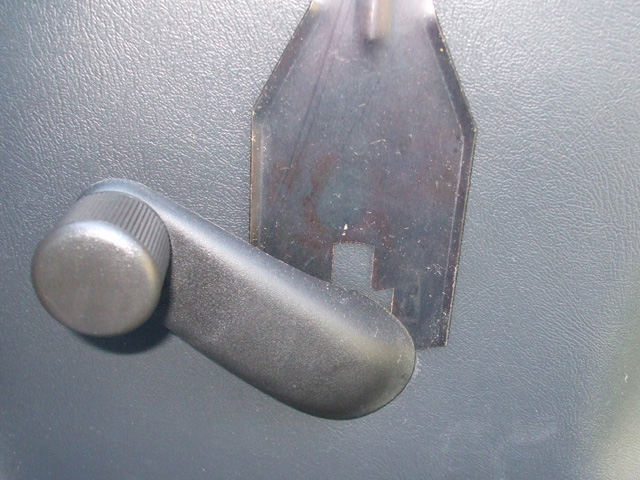
RODS
TABS
As you lift the handle, two plastic arms press down on the two tabs which pull the two rods, which opens the tailgate. I broke off one of these plastic arms in my frustration. I will give GM a kudos on the design though. Removal and replacement of the handle assembly involved only three bolts. Once I had the replacement part in hand the whole job took me about 15 minutes to complete. I now have a fully functioning pickup again.

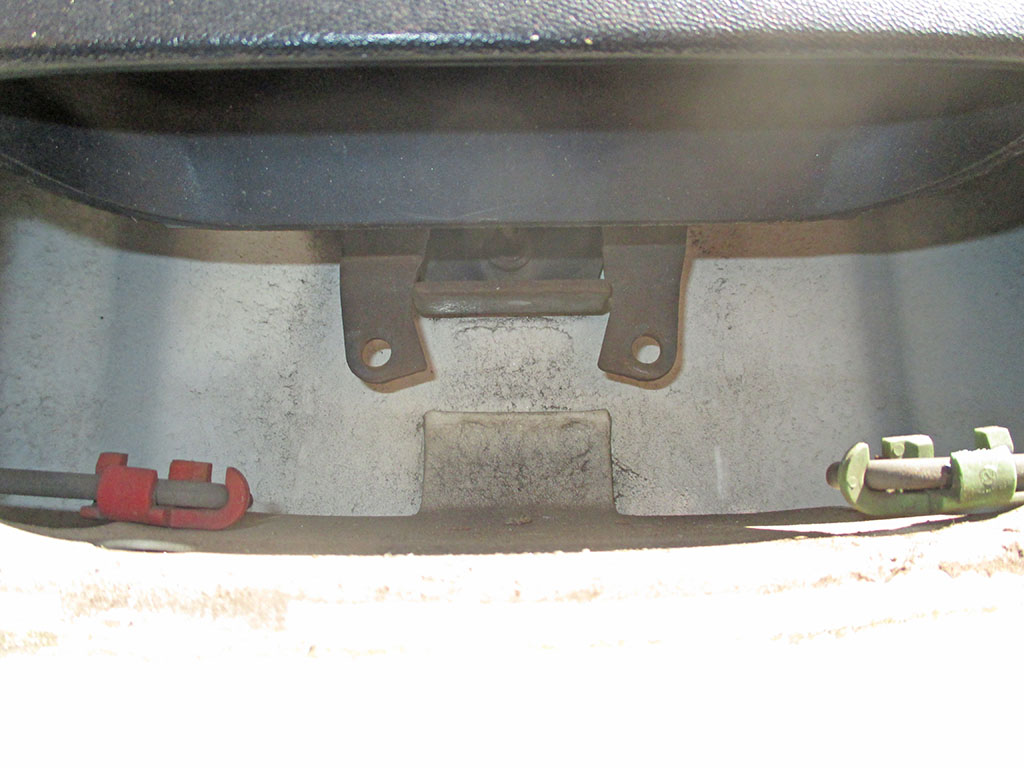
I made short work of the box and seconds later had a brand new (made in Taiwan), tailgate latch with new plastic "keepers." The keepers on the new unit come already installed, so all you have to do is mount the latch and hook everything up again. This must be a real time-saver on the old assembly line; shove the rod in, flip up the keeper, slap a trim bezel on, next.
For a do-it-yourself-er, the task is a bit "fiddly" as you try to hold the flat steel tab out towards the outside edge of the gate, so you can get the rod in the right hole. Heh, heh, heh. A sturdy pair of long-nose pliers came in real handy here. Once in the hole I flipped up each keeper until it snapped onto each rod locking it in place. Then I reinstalled the bezel (bottom tabs first) snapped it into place, job done.
Dent Repair - Summer 2014

Interesting story. I went to drop off my wife at work, where the parking lot was next to a sidestreet with no curb or sidewalk between the road and the parking lot. The road itself is narrow and school busses line up along the street leaving only a narrow strip of road where you can drive. There were no signs or marks in the street designating it as bus parking... probably because it is a street... you know, designed for vehicular traffic.
So I'm backing up. It's tight, like really tight. I'm jockeying back and forth. Driver of the bus apparently oblivious to me - or just doesn't give a shit. When in Rome. I backed up into the only space available, clipping the bus bumper. As I roar off, I see him (now evidently giving a shit), in my rearview mirror looking at his bumper and then me leaving. Fuck you asshole!
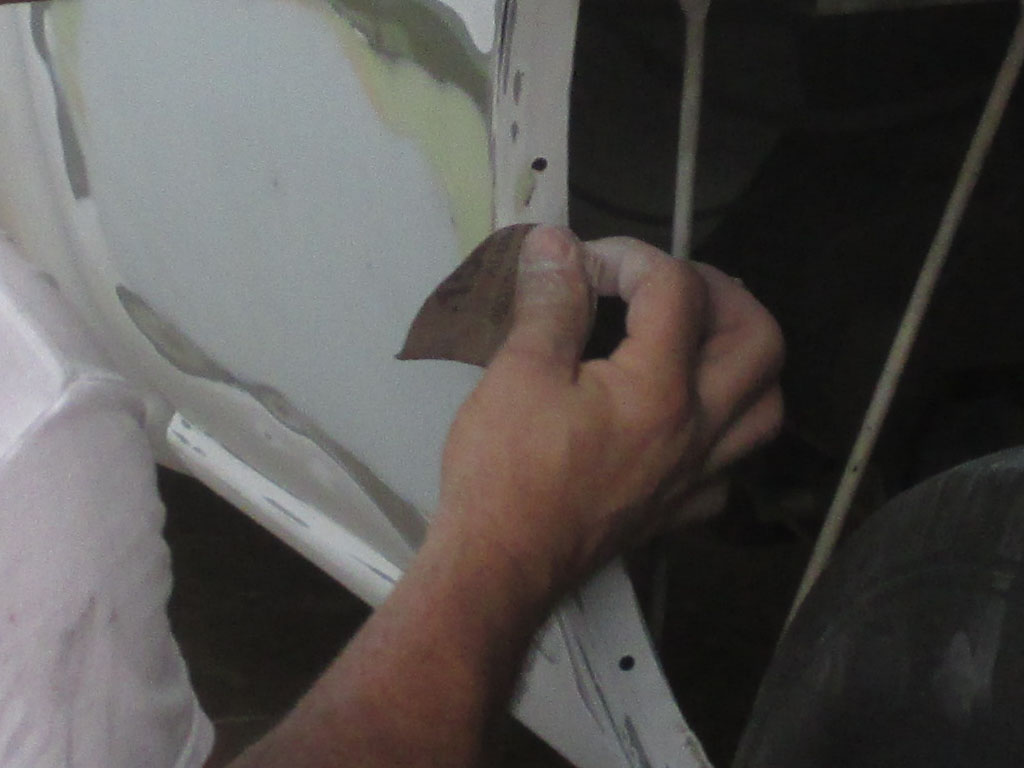
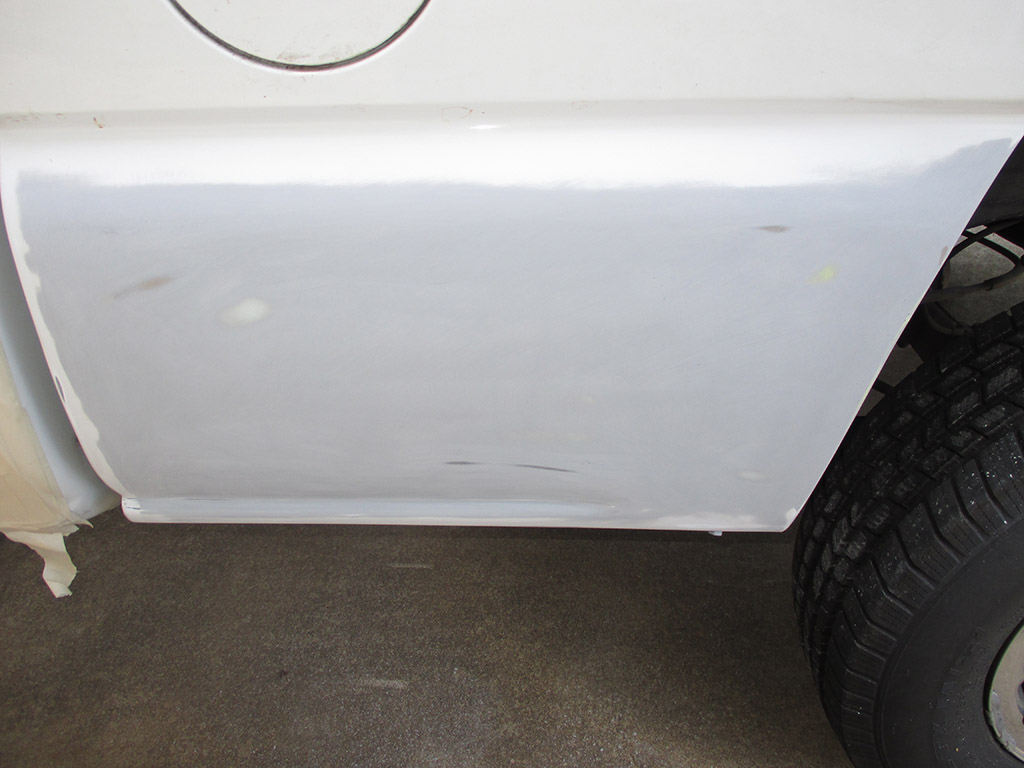
My confrontation with the bus left me with a slight crease in the fender and a black mark over the top of the wheel well. The mark will buff right out. The crease in the fender, not so much. Step one was to take some plastic trim removal tools and work them behind the factory rub strip glued to the fender. With the rub strip removed, we took a grinder to the area to strip off the factory paint.
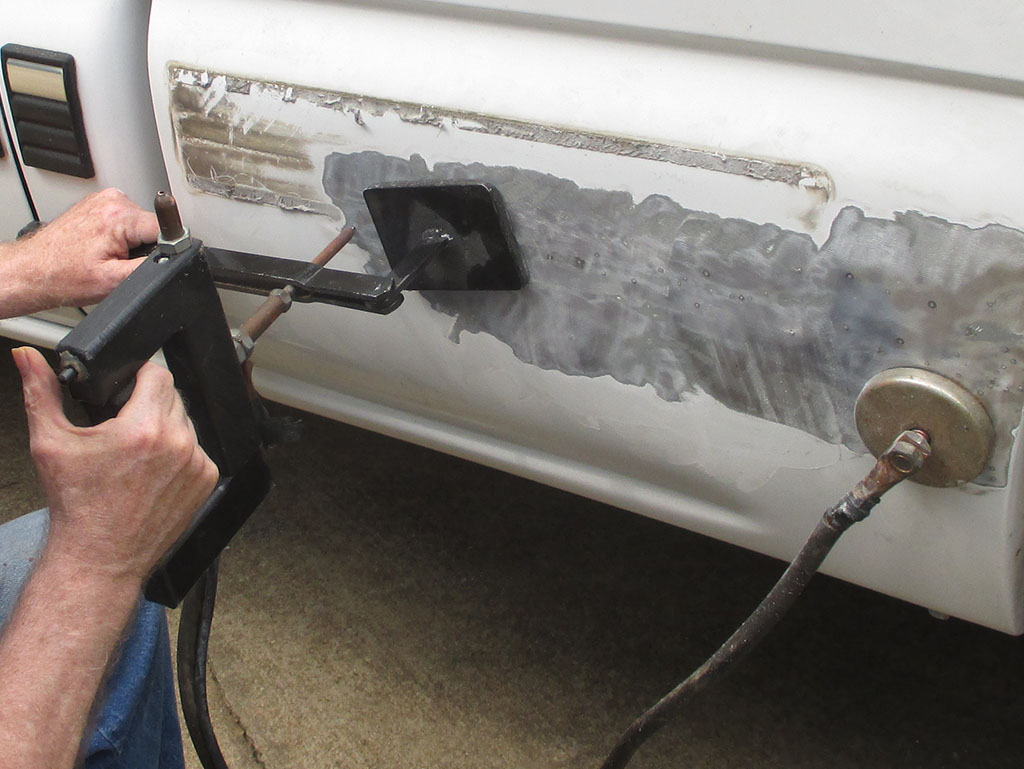
A stud welder dent removal tool was used to slowly work the steel back into shape as seen here. This is a pretty neat system, using a magnetic ground wire with a stud welding/pry-bar affair. A quick pull on the trigger and you have a stud welded to (in our case) the surface of the fender. This is better than the slide hammer style since you can gently move the metal back into position without over stretching it and having to resort to the "hammer, dolly, heat" method to work the steel back into shape.
With the crease pulled back out as close to the original bodyline as possible, it was time to start shaping things with fiberglass. I expect to have several layers laid down and sanded when it's all said and done. Part of this is due to the inevitability of low spots when you're working an area. You keep applying material then sanding it to get the profile you need.

LAYER 1
LAYER 2
The tool in use here is an air file. This was chosen due to the long narrow area we are working on. Once you get it close with the machine, you feel for any more low spots. Repeat as needed. At the end of the day we shot some black primer on the repair to protect it until the following week.

We started out using the air board with 320 grit on the primer. There was one obvious low spot we hit with another layer of filler. Then it was time to use the DA sander. By repeatedly feeling the repair we could determine how much primer to remove.
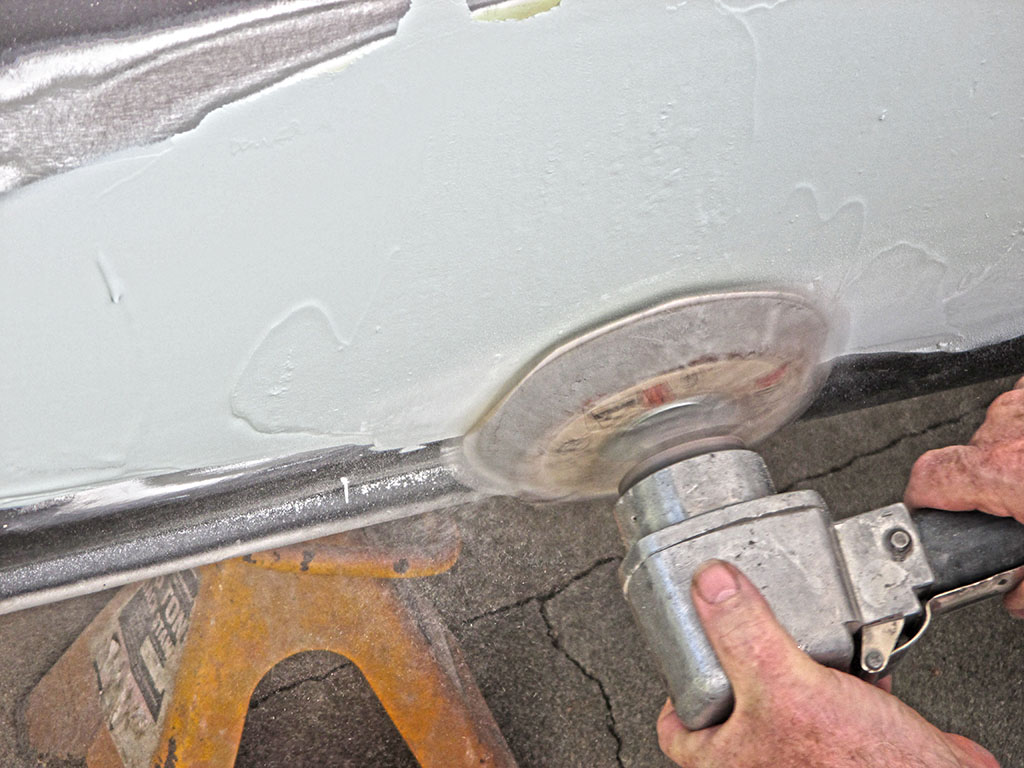
With other low spots in various part of the affected area, we decided on another full layer of filler, this time, green. We used blue hardener to get this tint, which let us see just where this layer was filling in low spots. Then it was time to use the DA sander again. As you can probably tell, this is a highly repetitive process.
At this point feeling the repair vs. the original contour of the steel told us we were still off. This time we used a hard block to work just part of the repair to get a better shape. We also shot a light fog of black primer to use as a guide coat for this area.
With everything else looking good, I worked on the ripple on the inner lip of the fender where the crease was. If I didn't go ahead and do this, you'd always be able to see and feel the damage. Already hot and sweaty, what the hell, may as well do the job right.
We were losing daylight fast by this point. The first thing we did was wipe down the repair area with some alcohol and lint free towels. As anyone who's painted cars/trucks can tell you, 90% of the job is preparation. We prepared the patch for primer, now we had to mask off where we didn't need paint.

READY
PRIMED
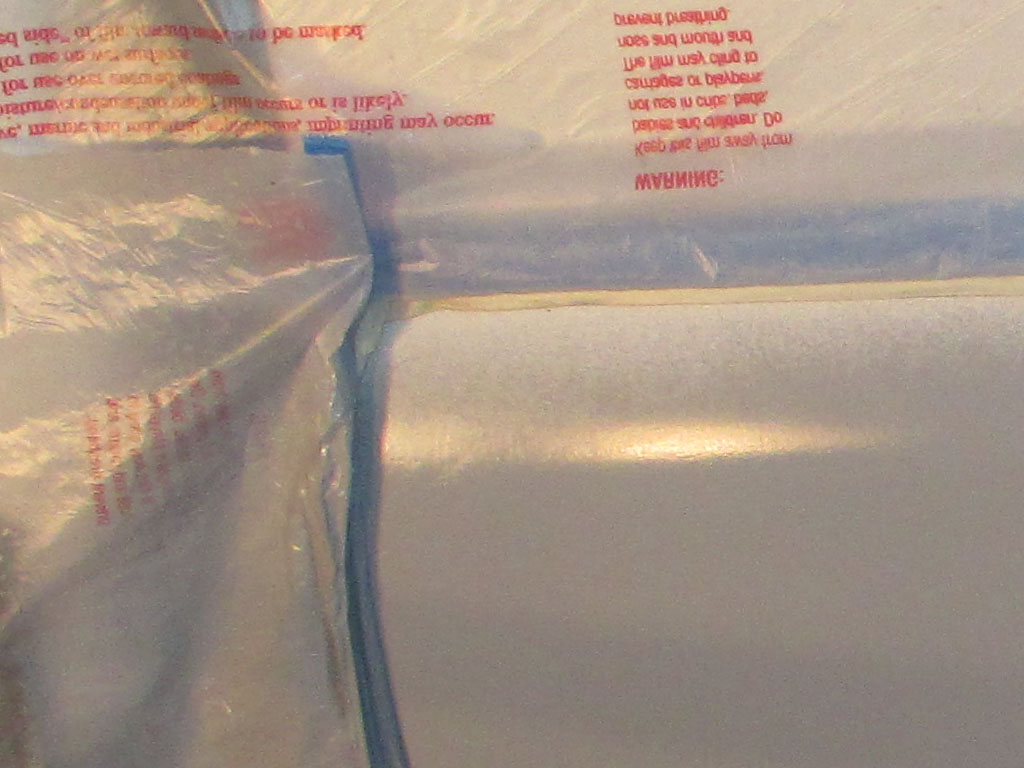
I learned about back masking. Using 3M masking film with integral tape, we taped over the repair. With the film hanging down over the repair, we flipped it up so the back side of the tape was exposed. We did this to create a softer edge between the epoxy primer and the OEM paint. By the time we were finished, we were using flood lights to see.
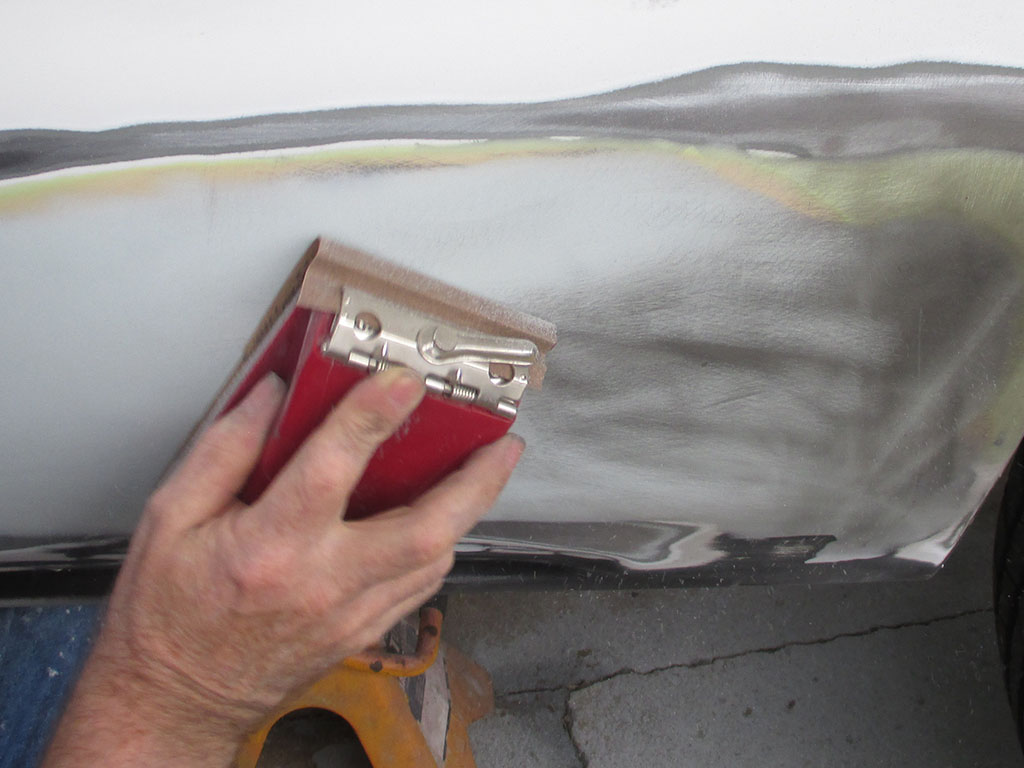
Another Saturday and we're back on the job. This time we used a flexible sanding block and 320 paper to prep the epoxy primer. Much to our surprise, we once again had low spots.
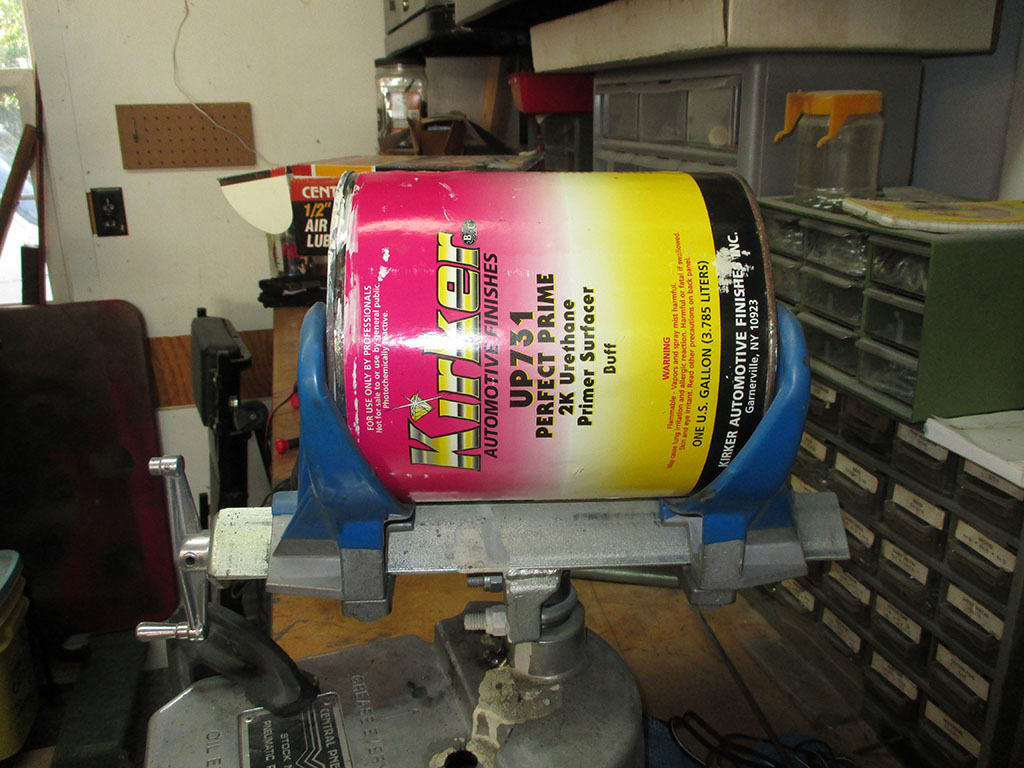
At this point we were shooting for a level surface. The surface height differences were slight, but they were there. We decided to break out the high build primer. I've heard it referred to as sprayable bondo or high build primer. The product we used is put out by Kirker and they refer to it as a primer/surfacer.
HIGH BUILD
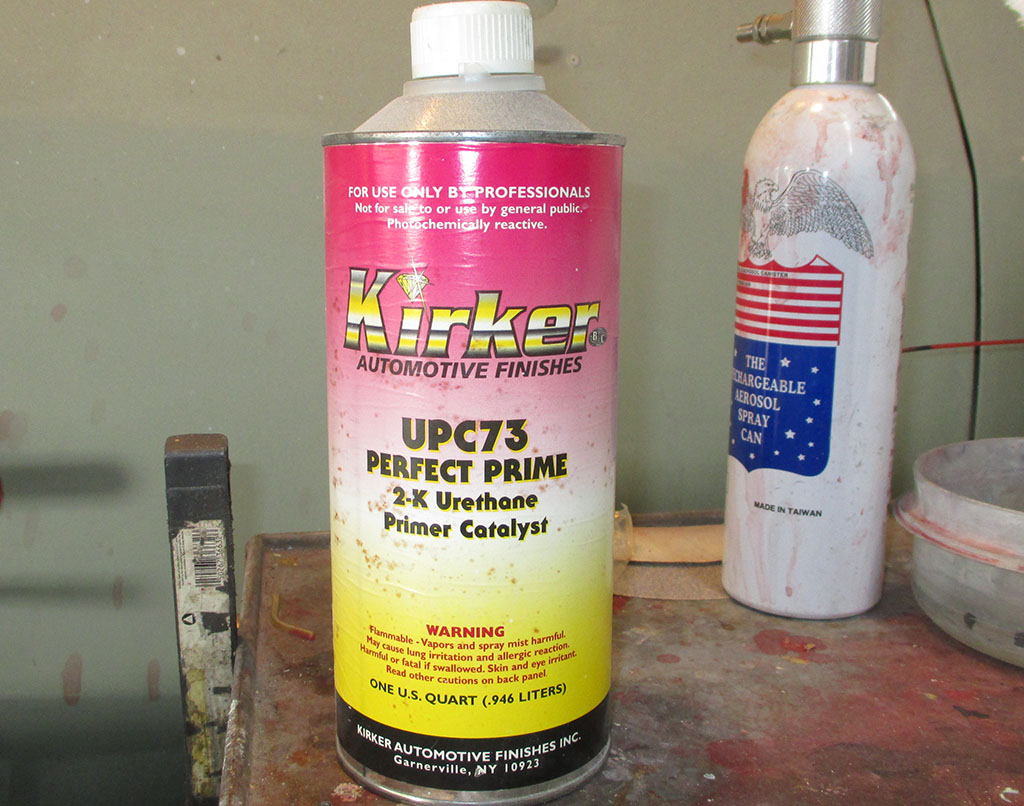
2K PRIMER
Since this stuff is so thick (compared to regular paint/primer) you need to use a smaller needle in the spray gun. If you have more than one gun, you can dedicate it to the thicker products. As with primer or paint, you have the product and the "activator" which makes it cure.
The next steps will be to sand the high build primer, give it a coat of epoxy primer, sand that, then top coat it. Since my truck came with a TC/CC (top coat, clear coat), I'm not sure what a pint or quart of each will cost. To be continued.
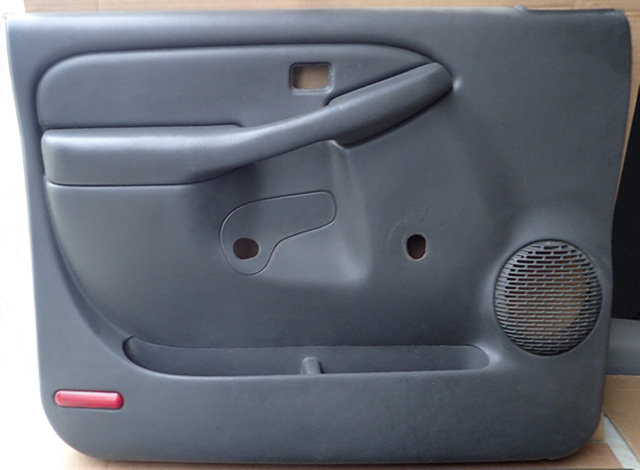
Speaker Sunday (10/24/11)
For quite some time now, I've had a couple of 6" round speakers sitting on my shelf, waiting to be installed in my truck. The stockers are blown and vibrate terribly at any volume level about a whisper. The weather man was calling for a bright sunny day with temps in the '70's. Perfect! I broke out my shop radio and my tools and went to work. At least that was the plan.
GM (in its infinite wisdom) decided to make the inner door panel of my 2001 Chevy Silverado look like it was molded from a single sheet of grey plastic. Upon discovering two relatively unobtrusive screws, I grew emboldened to give this a try. First, you need to understand that the last car I attempted this on was my late '80's Monte Carlo. The door panels on that car had spring clips around the perimeter.
What would you assume? That GM would continue to use this method until a better one could be devised? Unfortunately (for me) they devised this better method between the '80's and now. So I unscrewed the obvious screws and began to gently pry up at the edges of the inner door panel. When this yielded negative results, I applied more force.
Two things were working against me. A hidden third screw and the total redesign of the molded-in plastic clips that attach the inner panel to the steel of the door. I did successfully dislodge one clip (splitting the plastic of the door panel in the process) whereupon I discovered the error of my ways. With ALL THREE screws removed you simply lift upwards on the panel to remove it. Simple enough, provided you know what you're doing.
Having done this several times over the years (usually to repair a window that wasn't working properly) I knew that one of the first things to come off is the window crank handle. Assuming of course, that you have manual windows.
In the past, I would push inward on the door panel and use a coat hanger with a shallow hook bent in the end to snag the retention clip. I've also used needle-nose pliers with a 45* bend in them. Neither of which was perfect, but got the job done nonetheless.
Now however, I'm sophisticated enough to have the proper tool in my arsenal of tools to do the job the right way. I'm amazed to find that it works quite well and is a definite improvement on my previous method.
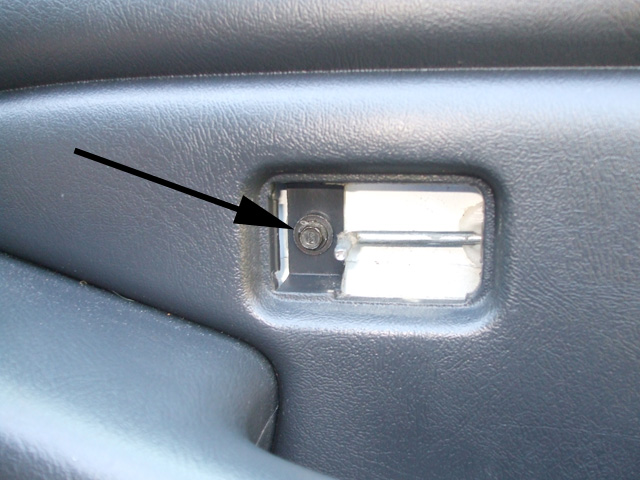
Here's the little booger that caused me all the trouble. Okay, truth be known it was a lack of knowledge and a shop manual that got me into trouble here. The arrow shows the obvious (not to mention the first) screw I discovered and removed to proceed with my little modification. It's also the longest one of the three, although I have no idea why.
This is why you buy a shop manual kiddies. So you can figure out the situation before you blunder into things like an angry gorilla, busting expensive parts all over the place. Of course the crack in the door panel was small and at roughly ankle level, but that just won't do for a perfectionist.
Nope. Not when you've got a soldering gun with plastic melting tips sitting in your drawer. But I'm getting ahead of myself again.
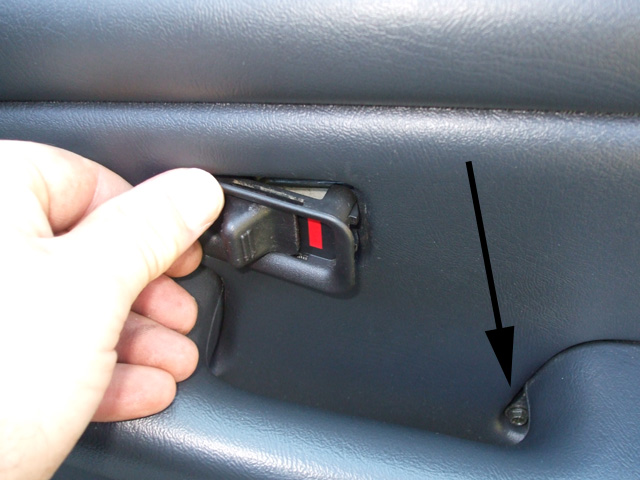
Once I tumbled to the fact that there had to be another screw holding the door panel to the door, I began looking at the door lock button. Hmm, you don't suppose... A bit of careful prying with a plastic trim removal tool popped it free in seconds.
No fuss, no muss, no busted parts. It's amazing how simple things are... if you know what the hell you're doing!
What we have here friends, is a nice little 7 mm hex-head sheet metal screw, which (when removed) frees up the inner door panel for easy removal from the door. That figures! If I was in a Bugs Bunny cartoon this is where I'd morph into a donkey... occasionally referred to as a jack-ass.
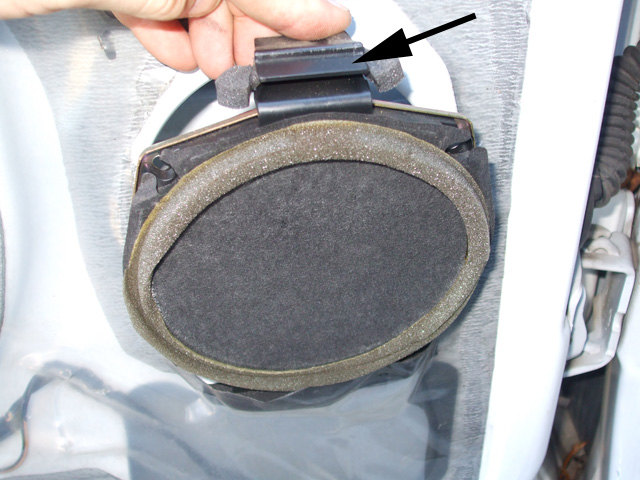
Okay, let's suppose you're savvy enough to remove the inner door panel with little to no damage. Like I was when I moved over to the passenger side of the truck to repeat this process. The arrow shows where you have to press down to release the spring tension that holds the bracket in place. Then you simply tip it forward and presto!
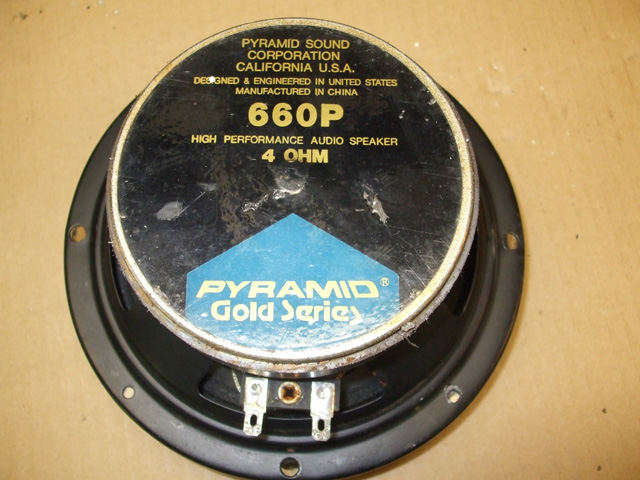
The stock paper cone style of speaker doesn't provide high fidelity. The itty-bitty magnet doesn't help matters either. I was rather impressed with all the foam rubber used to dampen the vibrations, but I really wanted to upgrade these to something better. Of course this means dispensing with the trick spring-loaded factory bracket which is probably epoxied to the speaker frame.
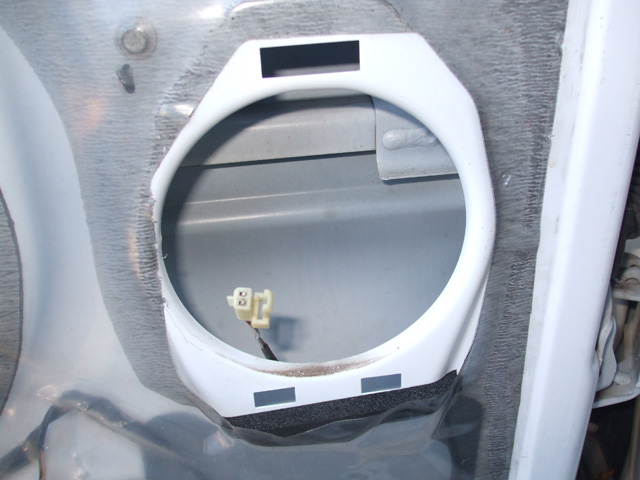
With the tinny factory speaker out of the way, you're left with this. That' a mighty empty hole now isn't it? Not to worry though, all I have to do is make sure that the new speakers will fit (they did) and find some way to mount them.
If you look closely, you can see that the hole is designed with a flare towards the inside of the door. What this means is that there isn't enough material to drill the four mounting holes that are needed for the aftermarket speaker. No worries, I solved this little road block the old fashioned way!
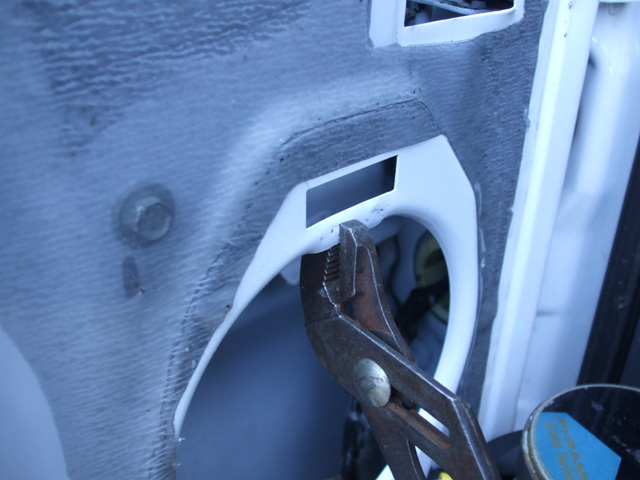
I briefly considered cutting a little slit on each side of the "tab" I was forming with the pliers. I decided against it because it would weaken the metal and this way I can always reform this to stock with pliers or some hammer and dolly work.
I oriented the speaker with the connections facing downwards, to at least partially protect them from water. Contrary to common belief, doors are not dry, instead the plastic, rubber and window felts control the water that enters the door.
I repeated this bending procedure 4 times, which gave me enough sheet metal to drill through without breaking through the edge. I tried a Crescent wrench too, but this setup gave me better results.
Here, in a nutshell, is what you're facing when you attempt a modification such as this. GM (and other manufacturers as well I suppose) have a nasty habit of using what's called "proprietary" connectors. This means that if you want this type of plug, you better visit your local factory authorized parts dealer, because no one else on the planet will have anything remotely like it.
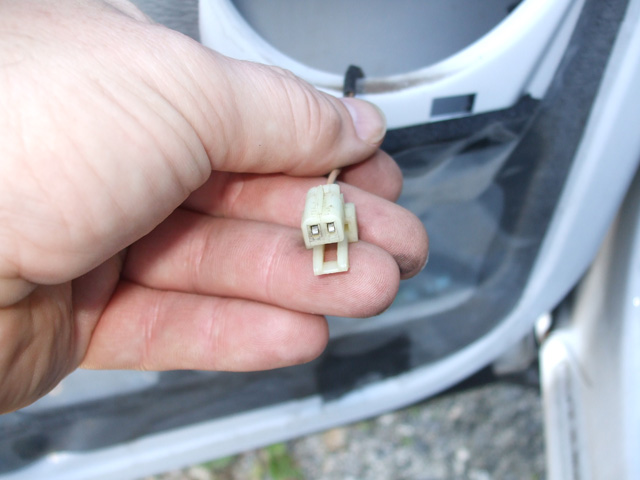
Although I've gone through great pains in the past to adapt factory plugs to aftermarket speakers, (I seem to have some weird aversion to hacking things up unnecessarily) there comes a time when you have to dispense with the niceties and go at things old-school.
A pair of diagonal cutters and one SNIP! later and... Problem solved.
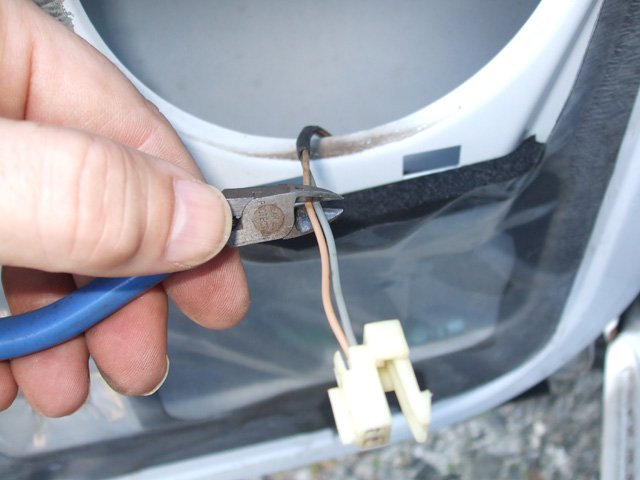
Naturally I'm pretty methodical even when planning a simple "plug-ectomy" such as this. The way I do it, is to make the cut far enough away from the connector so that (should the need ever arise) I can solder and shrink wrap the wires back to their stock configuration. You know... just in case.
Then I simply toss the plug into an organizer drawer I've designated for items just like this so if I ever need a plug (or even the pins from a given plug) I've got a source on hand. I pretty much never throw anything away. As soon as you do, you'll need just such an item to extract yourself from a given situation.
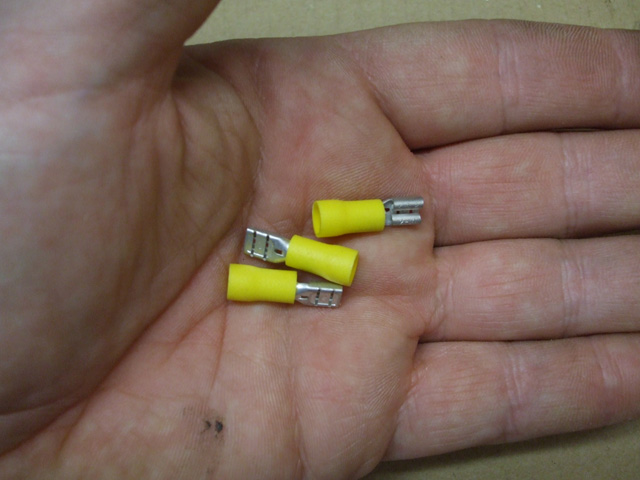
Since the factory speaker wires were far too fine to crimp as they were, I decided to add some solder to them, thickening up the connection.
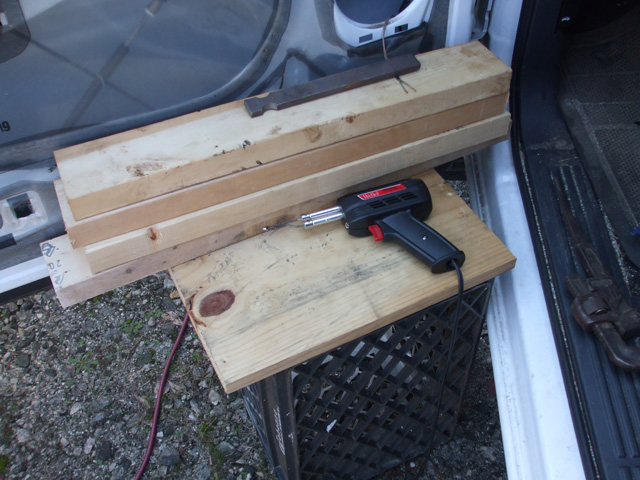
The only problem with this approach is that you're typically trying to solder a wire that is in some sort of oddball location, requiring some ingenuity to pull off. I usually find some method of mounting some small piece of scrap wood within easy reach of the wires in question.
In this instance, I had to construct a miniature gantry (milk crate and scrap lumber to the rescue) next to the door in order to gain accessibility to the wires and modify them as necessary.
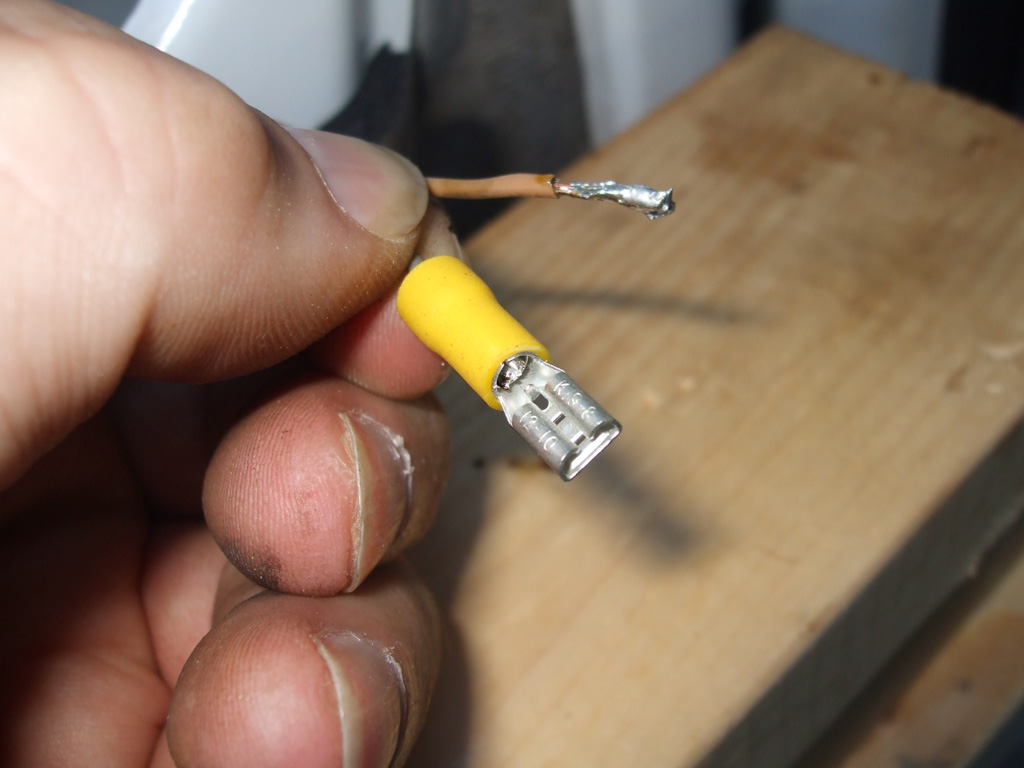
I've done this before (it's similar to building up a weld on top of a weld) and have encountered no problems. There may well be connectors for wires this fine that match the terminals on my new speakers, but that would necessitate a run to the electronics store. On a Sunday in the South? Fugeedaboutit!
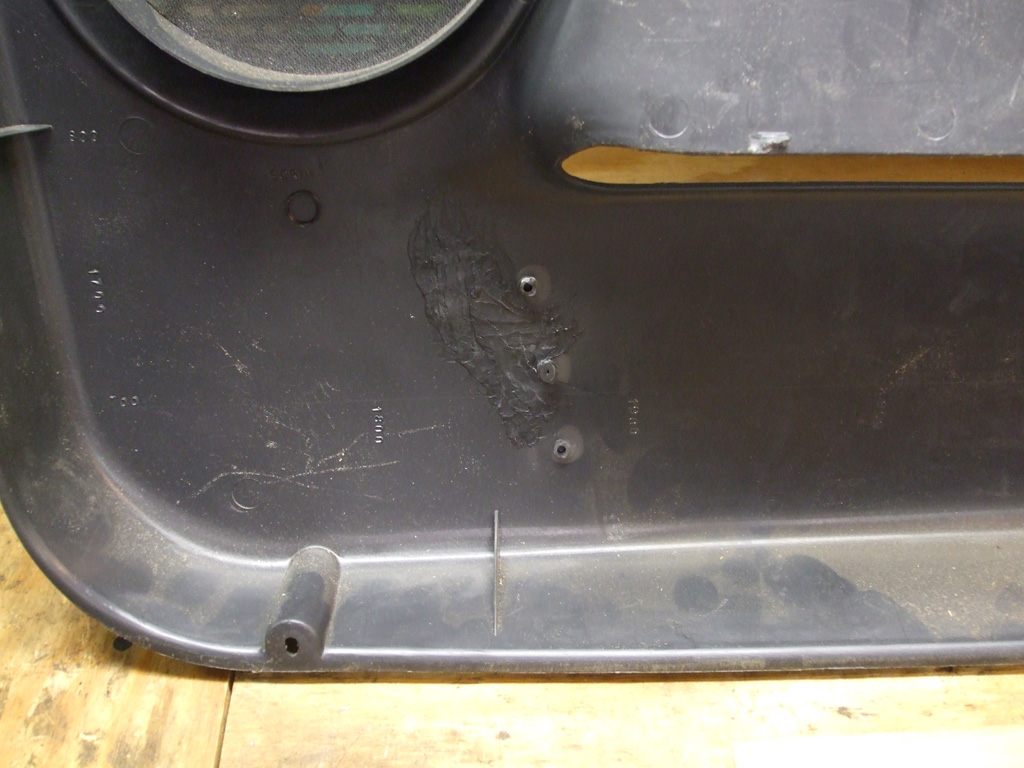
Here's a shot of my attempted repair to the (previously barely noticeable) split in the plastic. If I wasn't such a perfectionist, I'd have left well enough alone. GM used some sort of plastic that doesn't lend itself well to this type of repair.
The three round tabs just to the right of the damaged area hold a plastic pocket for storage. Not knowing how this panel was put together, I foolishly attempted to remove this pocket while the plastic panel was still attached to the door. I attempted to melt the tabs back together, but after the 10th or 11th try, (with nothing to show for my efforts) I blew a fuse. Several in fact.
In frustration I grabbed the plastic pocket and forcibly RIPPED it free from its few remaining factory molded moorings and threw it on the floor. Then I got MEDIEVAL on it, quickly turning it into a very large amount of very small pieces.
Well, needless to say I have absolutely no future as a plastic surgeon. I think what happened was I couldn't generate the right amount of heat over a large enough area. So the plastic got hot and shrunk instead of melting together and fixing the split in the plastic This had the effect of making the split in the plastic larger and I only succeeded in making matters worse.
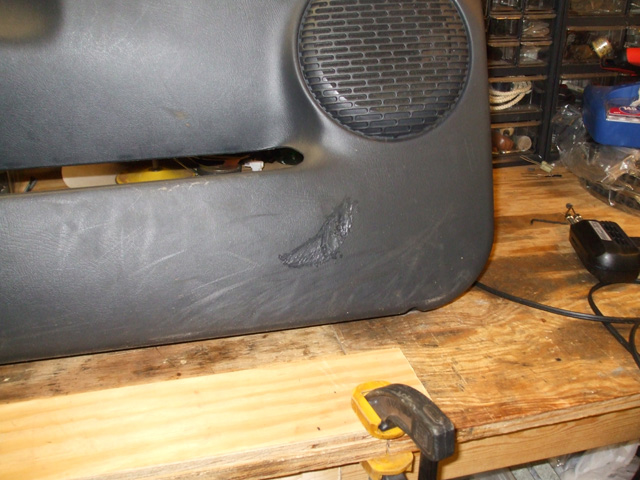
Finally realizing the futility of my efforts, I gave up and went upstairs in disgust. Now I have to look for a replacement panel, hopefully at a source other than the dealership, which (if my internet research is any indication) wants around $400 (give or take) for a replacement. So what does this mean? It means I get to make a trip to my local U-Pull-It and hopefully I can find a replacement that I won't have to take out a loan to afford.
As luck would have it, there were no trucks of my vintage in the three local pull your part junkyards. After pissing away most of a Saturday tramping around all three, I surfed over to the bay of E and found what I needed for $75 bucks. All in with shipping right around $100. Success!

© Copyright 2009 Brian Petruska | Top | Upgrades | GM Performance Parts | HTML Now! | Apple | Comments |